Mobile home bathrooms often come with original fixtures from the 1980s or 90s, tiny pedestal sinks, shower-tub combos that barely fit, and ventilation systems that sound like a jet engine. The good news: a mobile home bathroom remodel doesn’t require tearing down walls or hiring a crew. Smart upgrades to fixtures, flooring, and lighting can refresh the space dramatically, and because mobile homes have tight layouts, even modest changes feel major. This guide walks you through realistic, budget-friendly updates that respect the unique constraints of mobile home construction while delivering results you’ll actually enjoy.
Table of Contents
ToggleKey Takeaways
- A mobile home bathroom remodel can deliver dramatic results through smart fixture upgrades, new flooring, and improved lighting without major structural work or expensive contractor crews.
- Understanding your mobile home’s unique constraints—thin 2×2 walls, compact 5×7 layouts, and different plumbing routing—is essential before planning any bathroom renovation.
- High-impact, budget-friendly updates like paint ($30–$50/gallon), LED lighting sconces ($30), and vanity refacing ($15–$40 hardware) transform the space for under $100–$300.
- Waterproofing with 100% silicone caulk and moisture-resistant underlayment (6 mil polyethylene or Schluter membranes) prevents costly wall rot repairs that can exceed $5,000.
- Luxury vinyl plank flooring ($3–$8/sq ft) and large-format ceramic tiles ($6–$15/sq ft) offer durable, moisture-resistant alternatives to dated vinyl sheet goods and small tiles.
- Proper ventilation and a functioning exhaust fan running during and 30 minutes after showers keeps humidity under 50% and prevents mold growth in mobile home bathrooms.
Planning Your Mobile Home Bathroom Renovation
Before you buy anything, understand what you’re working with. Mobile home bathrooms are compact, often just 5×7 feet or smaller, and the plumbing and electrical systems are routed through the floor or exterior walls differently than site-built homes. Measurements matter more here because a standard vanity might not fit without rerouting utilities.
Start by documenting your current setup. Take photos and measurements of the width, depth, and height of the space. Note where the water inlet and drain lines are, where the vent stack exits, and which walls are load-bearing (though most mobile home walls aren’t). Check your home’s documentation for plumbing and electrical diagrams if you have them: the setup varies between manufacturers.
Assessing Your Current Layout and Constraints
Mobile home walls are typically thinner than site-built homes, usually 2×2 studs instead of 2×4, so framing for recessed shelving or adding a niche above the toilet takes care. The standard wall cavity won’t accommodate a traditional in-wall medicine cabinet without cutting into existing framing or utilities.
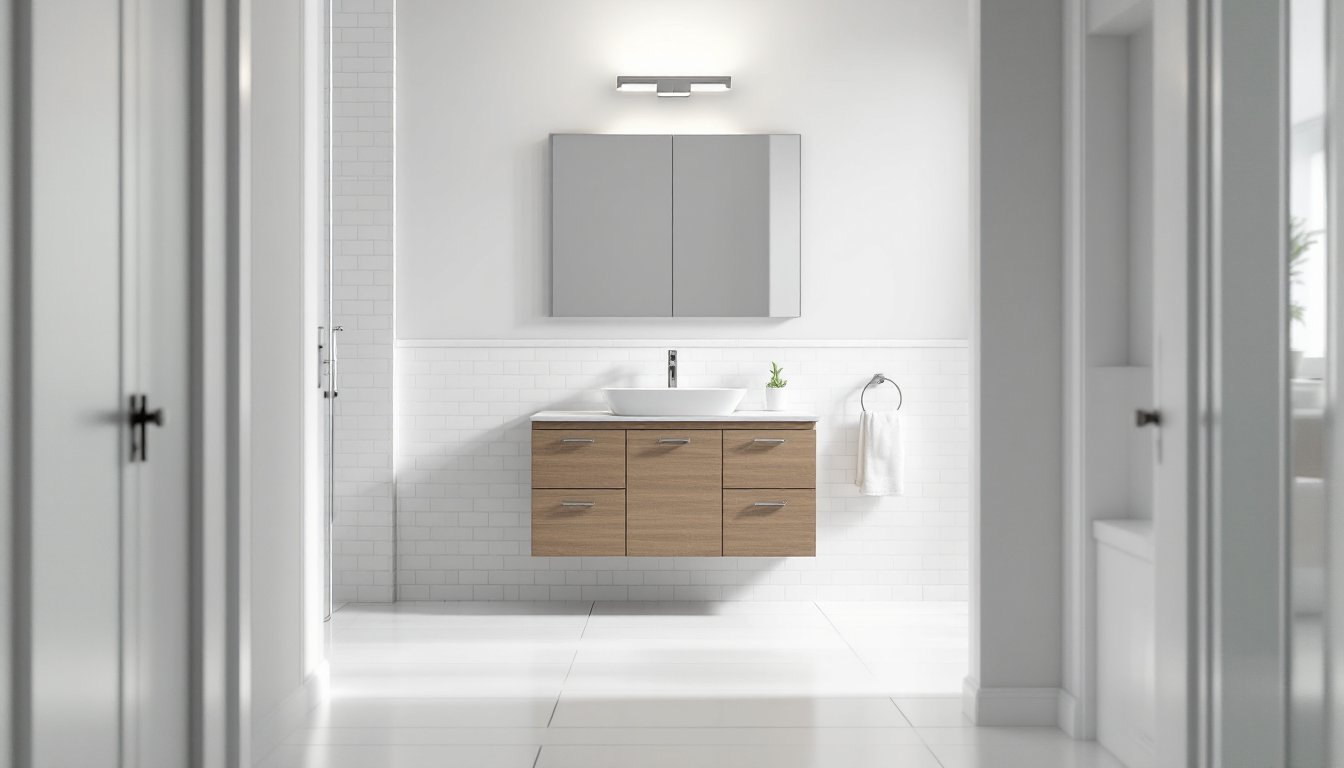
Floor space is your real constraint. A pedestal sink saves 24 square feet of floor visual space compared to a full vanity, but it limits storage. Conversely, a shallow wall-mounted vanity (15–18 inches deep instead of standard 21 inches) can fit where a pedestal won’t and still provide cabinet storage.
Water pressure and drainage can also be trickier in mobile homes. If you’re upgrading to a rainfall showerhead or multiple spray jets, check with your home’s documentation or a local plumber, some units don’t have the flow capacity for high-end fixtures without pressure issues. Likewise, if you add a larger vent opening or change drain routing, you may need to adjust the vent stack pitch, which should run at a 1/4-inch drop per foot of horizontal run per IRC standards.
Essential Upgrades That Make the Most Impact
Fixtures, Flooring, and Lighting Solutions
Faucets and showerheads deliver the quickest visual and functional upgrades. Swap out an old two-handle chrome faucet for a modern single-handle or brushed nickel finish in an afternoon. You don’t need high-end: a $60–$120 mid-range faucet with ceramic valve cartridges outlasts cheaper brass versions. For showerheads, look at low-flow, water-saving models (2 GPM or less), they reduce your water bill and often feel just as powerful thanks to better spray engineering.
Flooring is where durability really shows. Original mobile home bathrooms often have vinyl sheet goods or cheap ceramic tile. Luxury vinyl plank (LVP) has come far: today’s options look like real wood or stone, cost $3–$8 per square foot installed, and handle moisture better than laminate. Lay it over a vapor barrier or underlayment rated for wet areas, don’t skip this step. If you want something more premium, large-format ceramic tiles (12×24 inches or bigger) make small bathrooms feel larger and are easier to clean than grout-heavy small tiles. Budget $6–$15 per square foot for materials and labor.
Lighting transforms a dim, cramped bathroom into an inviting space. The standard single ceiling fixture won’t cut it. Add sconces flanking the mirror (4–6 inches above eye level) for even facial lighting, crucial if you’re doing makeup or shaving. A simple LED strip above or behind the mirror costs under $30 and adds modern ambiance. Recessed downlights above the toilet and tub add task lighting without eating into limited overhead space. Use 4000K or 5000K color temperature LEDs for bathrooms: they feel bright and clean without the sterile harshness of 6500K.
When sourcing materials, design inspiration from Houzz and renovation guides from Bob Vila offer real-world photos and cost breakdowns. You’ll also get contractor referrals if you decide to hire help for plumbing or electrical work.
DIY Tips for Budget-Friendly Updates
Paint is your cheapest cosmetic win. A high-quality semi-gloss or satin bathroom paint (moisture-resistant, mildew-resistant) costs around $30–$50 per gallon and covers roughly 300–400 square feet. Two coats on walls and ceiling transform the mood for under $100. Prep is everything: fill cracks, sand glossy surfaces so new paint adheres, and use a primer on stained or water-damaged areas. A bathroom exhaust fan running during and for 30 minutes after painting helps prevent mildew later.
Vanity and cabinet refacing saves money over replacement. If your existing vanity is solid but dated, paint it with Cabinet & Trim paint (oil-based or high-quality acrylic) and swap the hardware. A brushed nickel or matte black handle kit costs $15–$40 and instantly modernizes the look. Add open shelving above the toilet using 1×10 or 1×12 lumber mounted on French cleats, this adds storage and visual interest without a full renovation.
Tile updates don’t always mean full replacement. A 3×6 inch subway tile backsplash behind the sink, applied over existing tile with thin-set and grout, costs $200–$400 in materials and tools. Use a wet saw (rental: $30–$50 per day) or a grinder with a diamond blade for cuts. Grout should be epoxy-based or urethane in wet areas, cheaper acrylic grout mildews and stains.
When considering bigger swaps, selling a mobile home in the future factors into your ROI. Focus on updates that feel fresh without over-personalizing, neutral colors, durable finishes, and good plumbing/electrical functionality appeal to more buyers than trendy niche choices.
Waterproofing and Ventilation Considerations
Water intrusion is the silent killer of mobile home bathrooms. Because walls are thin and the structure is on a foundation that can shift slightly, caulking and sealing are non-negotiable. Use 100% silicone caulk (not acrylic) around the tub-wall joint, toilet base, and any penetrations. Reapply it every 5–7 years: it’s a $5 preventive that saves thousands in wall rot repair.
Ventilation prevents mold and moisture buildup. Most mobile home bathrooms have a bathroom exhaust fan vented to the roof or exterior wall. Verify it’s working by holding a tissue to the grille while it runs, it should draw it in. If it’s weak, the motor may be failing or the duct might be kinked or clogged. A replacement fan-light combo unit costs $80–$200 and takes 2–3 hours to install if you’re comfortable with electrical work (or hire an electrician for $150–$300 in labor). Run the fan during showers and for 30 minutes after to keep humidity under 50%.
Underlayment under flooring is mandatory in wet areas. Before laying vinyl or tile, install a waterproof substrate like Schluter or Ditra-XL (uncoupling membrane) or a polyethylene vapor barrier at least 6 mil thick. This stops water from seeping into the subfloor and rotting the wooden support beams, a repair that costs $1,500–$5,000. When installing new plumbing, use PEX tubing instead of old galvanized steel if you’re replacing supply lines: it’s flexible, corrosion-resistant, and easier to work with. If you’re not confident in your plumbing skills, bring in a licensed plumber, getting drain slope or vent routing wrong leads to slow drains and odors that are expensive to fix later.
Comprehensive remodel advice from Remodelista offers step-by-step walkthroughs and product sourcing tips for bathroom projects of all scales.
Conclusion
A mobile home bathroom remodel doesn’t demand a six-figure budget or a contractor crew. Thoughtful upgrades to fixtures, smart flooring and lighting choices, and meticulous attention to moisture barriers and ventilation yield a bathroom that feels new and functions well for years. Start with planning, know your space’s constraints and what’s beneath the walls. Prioritize impact: paint, lighting, and hardware deliver 80% of the visual transformation for 20% of the cost. Leave plumbing, electrical, and structural work to licensed professionals, but own the cosmetic finishing touches yourself. Your mobile home will feel less like a dated relic and more like a comfortable, updated home.